Keto crispbread recipe
Have you just started your keto journey? Do you miss crunchy and crispy foods? Don't despair; just try this keto crispbread.
Posted on January 24, 2021
A common complaint I hear from people at the beginning of their keto journey is that they miss food with a crispy texture.
Fortunately, there are plenty of recipes out there for crunchy things: from crackers to this delicious seed crispbread recipe. It will satisfy your craving for crispy and crunchy bread, without sacrificing your diet.
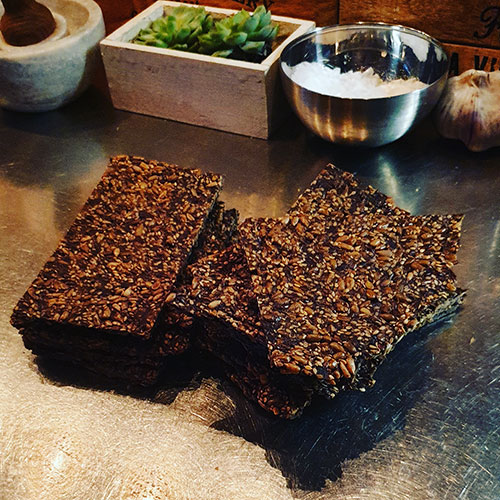
Since I make them with seeds only, they are gluten-free, low carb, and packed with fiber.
I like to eat them with a thick spread of butter and perhaps a slice of cheese, but they go well with all sorts of toppings. Try them out with smoked salmon and dill, or why not a tuna salad?
The inspiration for this recipe comes from Martina Johansson's book The Keto Guidebook.
| Flaxseeds | 60 g / 1 dl | 2 oz |
| Sesame seeds | 100 g / 1,5 dl | 3.5 oz |
| Sunflower seeds | 150 g / 2,5 dl | 5.3 oz |
| Chia seeds | 50 g | 1.75 oz |
| Almond flour | 45 g / 1 dl | 1.5 oz |
| Psyllium husk powder | 60 ml / 4 msk | 4 tbsp |
| Water | 5 dl | 2 cups |
| Salt | 5 ml / 1 tsk | 1 tsp |
Part 1 — 5 minutes of prep time and 8 hours of idle time
Part 2 — 15 minutes of prep time, 4 hours of baking time, and 1 hour of idle time
These will easily keep for two weeks in the pantry, but I doubt that they will remain for that long. 😊
Did you like this recipe? Leave a comment below!
Join my mailing list and get notified whenever a new post is out.
Topics range from personal development, to fitness and nutrition. In short – everything that makes up a sustainable healthy lifestyle.
I won't spam you, and you can unsubscribe at any time.
A welcome email is on the way – please check your spam folder if it doesn't show up.
And to ensure that you don't miss anything in the future, add secondhalfcrusher@gmail.com to your trusted senders in your email program.